PWI000006
this document applies to :
It is important to probe the first point correctly, approaching the surface
from the direction of the surface normal. Failure to do so may
result in wrongly positioned entities.
This note is intended for users of Rigid Probes (normally supplied with inspection arms e.g. Romer).
It is important to probe the first point correctly, approaching the surface from the direction of the surface normal. This allows PowerINSPECT to determine the surface offset from the probe centre. This is necessary to determine the true position of the surface.
For example, when probing a circle, PowerINSPECT needs to determine whether the surface is on the “inside” or the “outside” of the probed circle. If the probe is NOT nearly perpendicular to the surface for the first point, PowerINSPECT may measure the feature incorrectly. This only applies to the first point probed in a feature.
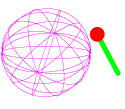
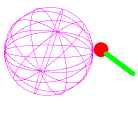
Shown below are examples of how to probe a plane and a sphere correctly. Each example shows a right way and a clearly wrong way, as well as a typical ‘borderline’ case which might cause problems. You should always be sure to probe the first point correctly.


