Off-line Inspection with PowerINSPECT
Context
this document applies to :
- PowerINSPECT 1355 and later
Gripe no 000
Summary
PowerINSPECT 1355 has point cloud functionality. This allows pre-recorded point
clouds to be used for surface inspection. This is off-line inspection. The
software is designed for use with aligned point clouds (as produced by typical scanning
machines) but there is a WORKAROUND which makes it possible to carry out a free form
alignment by simulating a PowerINSPECT log file.
Description
You will need to create at least TWO points files. One file
will contain the surface inspection points. The other file(s) will contain the
points used for positioning.
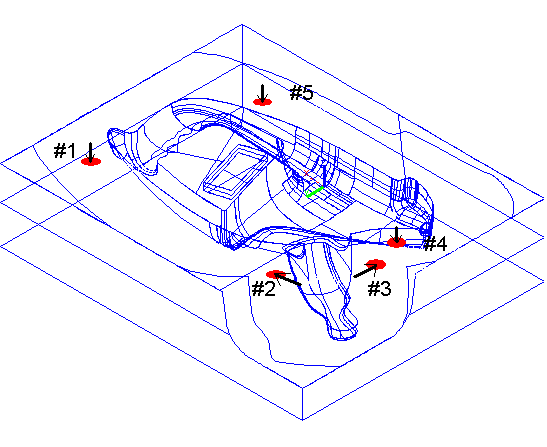
1. Decide how to create an alignment
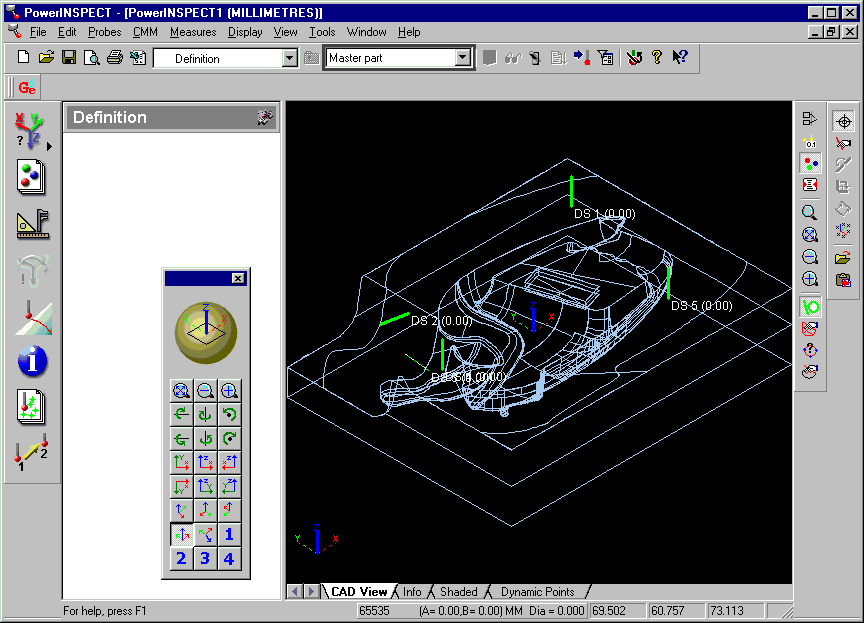
For example: the five positions below have been selected for
a free form fit
2. Record the size of the probe being used for the measurements.
For example, a 2mm ball probe has been used for this example
3. Probe these points on the part with the CMM and save them to a file.
This file is the 'positioning' file. Take a note of the approximate i,j,k or surface
normal vectors for each point.
For example: these points were taken on the CMM and saved to
file.
POINT 251.715,175.327,-248.279
POINT 365.246,188.045,-261.851
POINT 399.733,225.691,-257.726
POINT 393.143,240.207,-248.365
POINT 273.757,278.793,-248.28
Point 1 was: Z+ in CMM coordinates
Point 2 was: X+ in CMM coordinates
Point 3 was: Y- in CMM coordinates
Point 4 was: Z+ in CMM coordinates
Point 5 was: Z+ in CMM coordinates
4. Probe the points required for the surface inspection and save them to another
file. This is the 'inspection' file. Take a note of the approximate i,j,k or
surface normal vector for the first point.
For example: this is the start of a point file.
POINT 351.308,163.106,-248.391
POINT 297.415,162.894,-248.311
POINT 222.656,159.917,-248.26
POINT 224.273,219.516,-248.21
POINT 218.112,291.069,-248.128
...etc..etc..
Point 1 was: Z+ in CMM coordinates
5. Modify the 'positioning' file so that it takes the following format.
0 X Y Z I J K probedia
1 X Y Z I J K
2 X Y Z I J K
3 X Y Z I J K
For example: the point file from step 3 has been modified as follows.
0 251.715 175.327 -248.279 0 0 1 2
1 365.246 188.045 -261.851 1 0 0
2 399.733 225.691 -257.726 0 -1 0
3 393.143 240.207 -248.365 0 0 1
4 273.757 278.793 -248.28 0 0 1
6. Save this modified 'positioning' point file with a .log extension
7. Modify the 'inspection' file so that it takes the following format
X Y Z I J K probedia
X Y Z
X Y Z
For example: the point file from step 4 has been modified as follows:
351.308 163.106 -248.391 0 0 1 2
297.415 162.894 -248.311
222.656 159.917 -248.26
224.273 219.516 -248.21
218.112 291.069 -248.128
8. Save this modified 'inspection' file with a .asc extension.
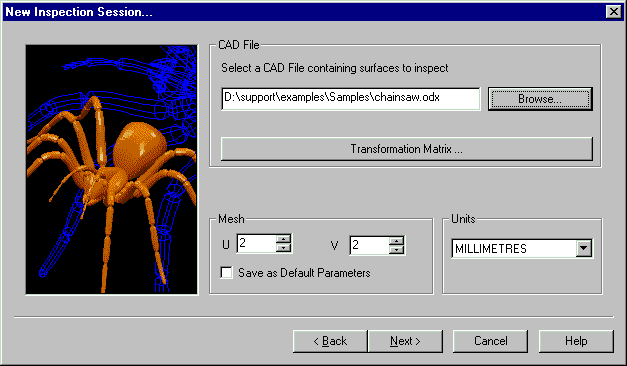
9. Open a PowerINSPECT session with the relevant CAD file.
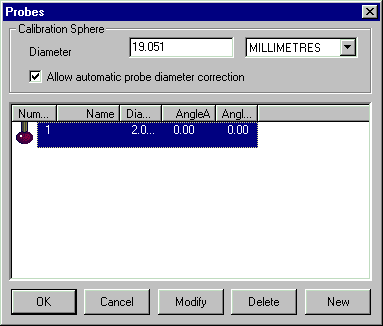
10. Create a new PowerINSPECT 'probe change' to match the actual probe.
Select it. DO NOT CALIBRATE THIS PROBE IN PowerINSPECT.
11. Create in PowerINSPECT the features used for alignment. This should
correspond to the data measured in step 3.
In this example we create a 'Free Form Fit' alignment accordng to the positions decided
in step 1.
12. 'Measure' these features in PowerINSPECT using the log file.
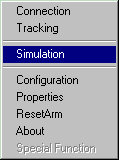
Access the log file with Measures- Simulation, or by 'right clicking' on the connection
flash and choosing Simulation
Choose the 'positioning' log file created in step 6.
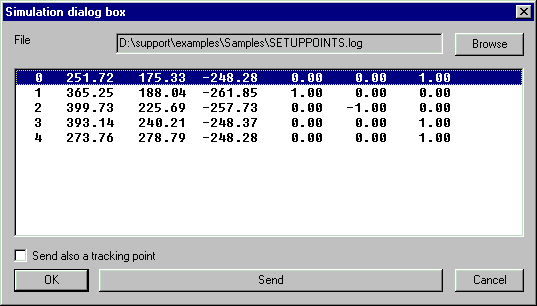
Start measuring, and senc each point to PowerINSPECT by selecting the line and pressing
'Send'.
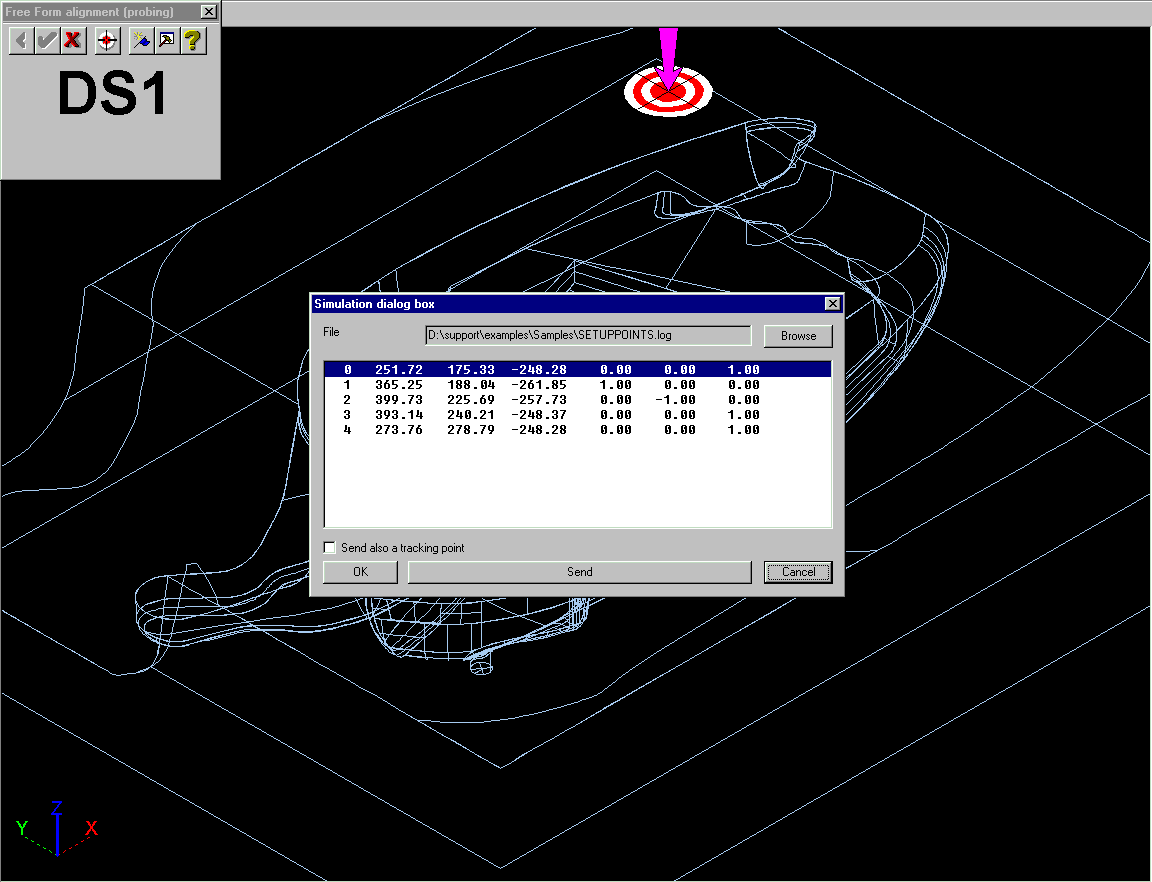
Complete the alignment as usual.
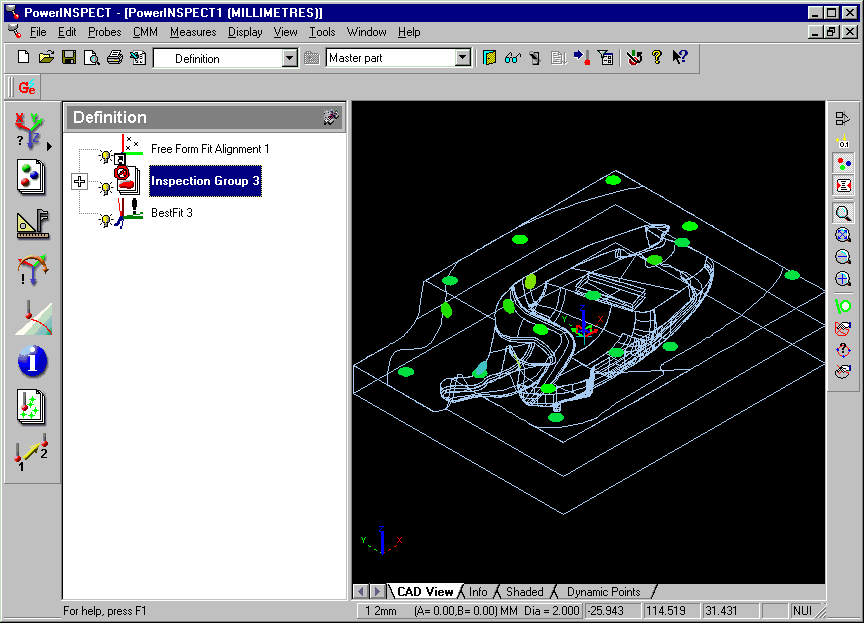
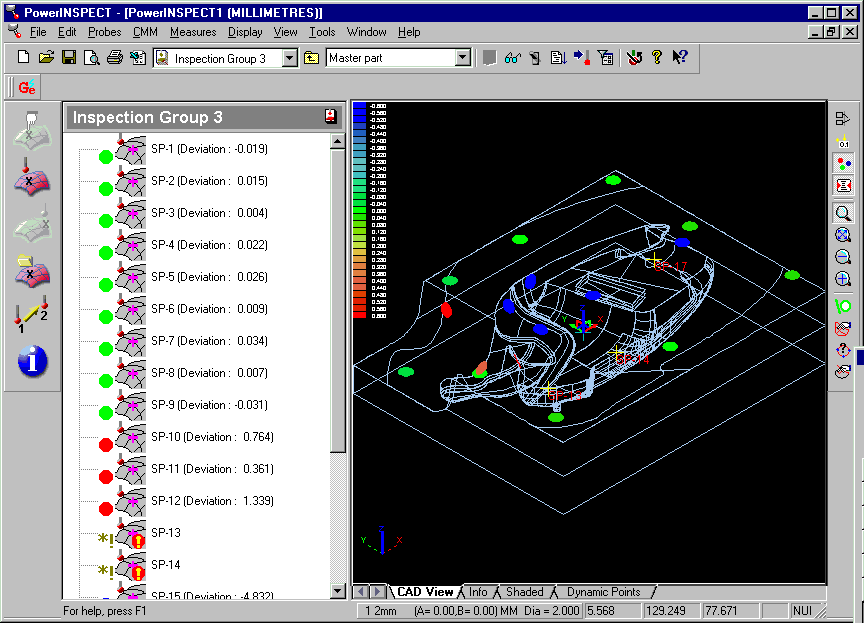
13. Create an 'Inspection Group' for 'Points on the Fly.' Use 'Import
Points from File.'

and select the 'inspection' file created in step 8.

This will add confetti to the screen in the normal way.
 '
'
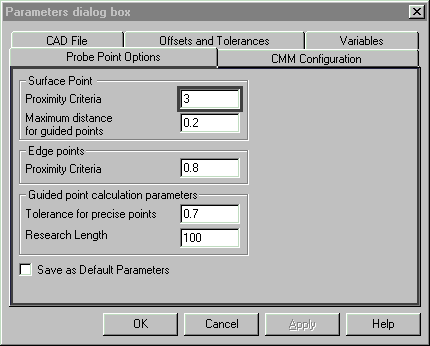
14. You may need to experiment with Measures- Parameters- 'Probe Point Options'
to set appropriate Proximity Criteria. If you have to increase the Proximity
Criteria you will have to take the points again.
15. Create a Best Fit in the normal way.